Walkthrough
 Contents
Chapter 4 Hostility and Friends
Usagi's House
Luna remarks Anshar being on the enemy's side and Usagi says it was too much for Chibi-usa. Shingo enters Usagi's room and tells her about Chibi-usa hanging her head and keeping quiet. He wonders if she's being bullied. Usagi exclaims how annoying her brother is, butting in her room like that. Shingo calls Usagi a baka (idiot) and runs out of her room (LOL!)Usagi comments on Shingo always being typical.
Luna figures that Anshar's sister is Sin. Perhaps Sin is the leader of the enemies who want to change the destiny of the world. Usagi's mom abruptly calls her downstairs to answer a telephone call. Usagi and Luna go downstairs to answer the phone. Ami has called and reports that Mamoru has regained consciousness! Hearing this, Usagi is ecstatic. Ami says that for him to recover, he could use another day or so of rest. Usagi starts jumping up and down blissfully.
In the family room, Chibi-usa is still utterly disappointed over the fact that Anshar had betrayed her. Usagi tells her that Mamoru has gotten all better and Chibi-usa is surprised. Usagi suggests that they should go visit Mamoru's apartment and Chibi-usa agrees. Usagi and Chibi-usa run out the door, leaving Ami on the line without saying bye =D Luna tags along with the two.
Keep going right, until you enter the next screen.
The town of Juuban
.png) Juuban
Juuban
Keep going right, until you enter the next screen. Now go right, past the Bus Stop sign, and you will see a banner that says “maison”. Enter and you will be in the apartment building.
Mamoru's Home
Go up to the left elevator, then go left to the first door that you see (next to the Luna-P) and enter.
Minako, Rei, Makoto, and Ami will be in the living room. Talk to them if you want, then enter Mamoru's bedroom.
Usagi and Chibi-usa have come to see Mamo-chan. Usagi gives her thanks to Mamoru for protecting her. Mamoru is glad to see both of them safe and abruptly starts coughing. Chibi-usa asks if he's okay and tells him to hold tight. Mamoru says he's ok and he wants to talk with everyone now.
Mamoru says he had another dream. Perhaps it was a premonition. The enemy went to a time long ago. In the old Moon Castle, some people had the Barazuishou. Chibi-usa asks if Anshar was there too, but Mamoru answers that Anshar didn't have the Barazuishou. If they travel to the Sea of Serenity of Earth, they should be able to go back to the past. The real enemy wasn't Anshar. The real enemy was -cough- -cough- Mamoru starts coughing again.
In the living room, the Senshi are having a meeting. Luna says that for Usagi's sake, the Senshi should use their strength and open their eyes. Luna asks if Mamoru said anything. Usagi answers that Mamoru said that the enemy traveled far back into the past. Minako exclaims she cannot remember anything from the past, not even Princess Serenity! Ami can't remember either! Usagi is confused and asks how they don't remember her at all! Luna also forgets about Princess Serenity! Makoto wonders if something has caused their memories to disappear.
Maybe, in the past, the Oppositio Senshi did something to change world events. Perhaps the destiny that made Usagi-chan be born as Serenity changed. Maybe Usagi-chan won't be able to become Sailor Moon! Ami says it's not the end of it. Perhaps destiny will change so that Usagi-chan and Mamoru-san will never meet up. Usagi is enraged by this, but Rei consoles her.
It seems that the Senshi have to return the past to normal. But how will they get there? Minako suggests that they use the Time-Space Door. Ami replies that it's too dangerous since enemies are using the door. Usagi wonders if Sailor Pluto is okay. Rei asks Chibi-usa if she knows, but Chibi-usa doesn't. Luna suggests that they should go see the Time-Space Door. But to get there, they'll need to use the Time-Space Key, which Chibi-usa has.
Haruka asks if they should be going to the Time-Space Door. Michiru states that since Mamoru has woken up, it'd be a disaster if the enemies tried to take advantage of this situation.
Luna asks who else, besides Usagi, should go to the Time- Space Door. To get there Usagi, Chibi-usa, and 3 more people are needed. With that said, you get a party selection screen displayed. It is up to you, but I suggest bringing Saturn, Mars, and Venus along.
After you're done choosing, the five girls transform into Sailor Senshi and ChibiMoon use the Time-Space Key. The Senshi are transported near the entrance of the Time-Space Door.
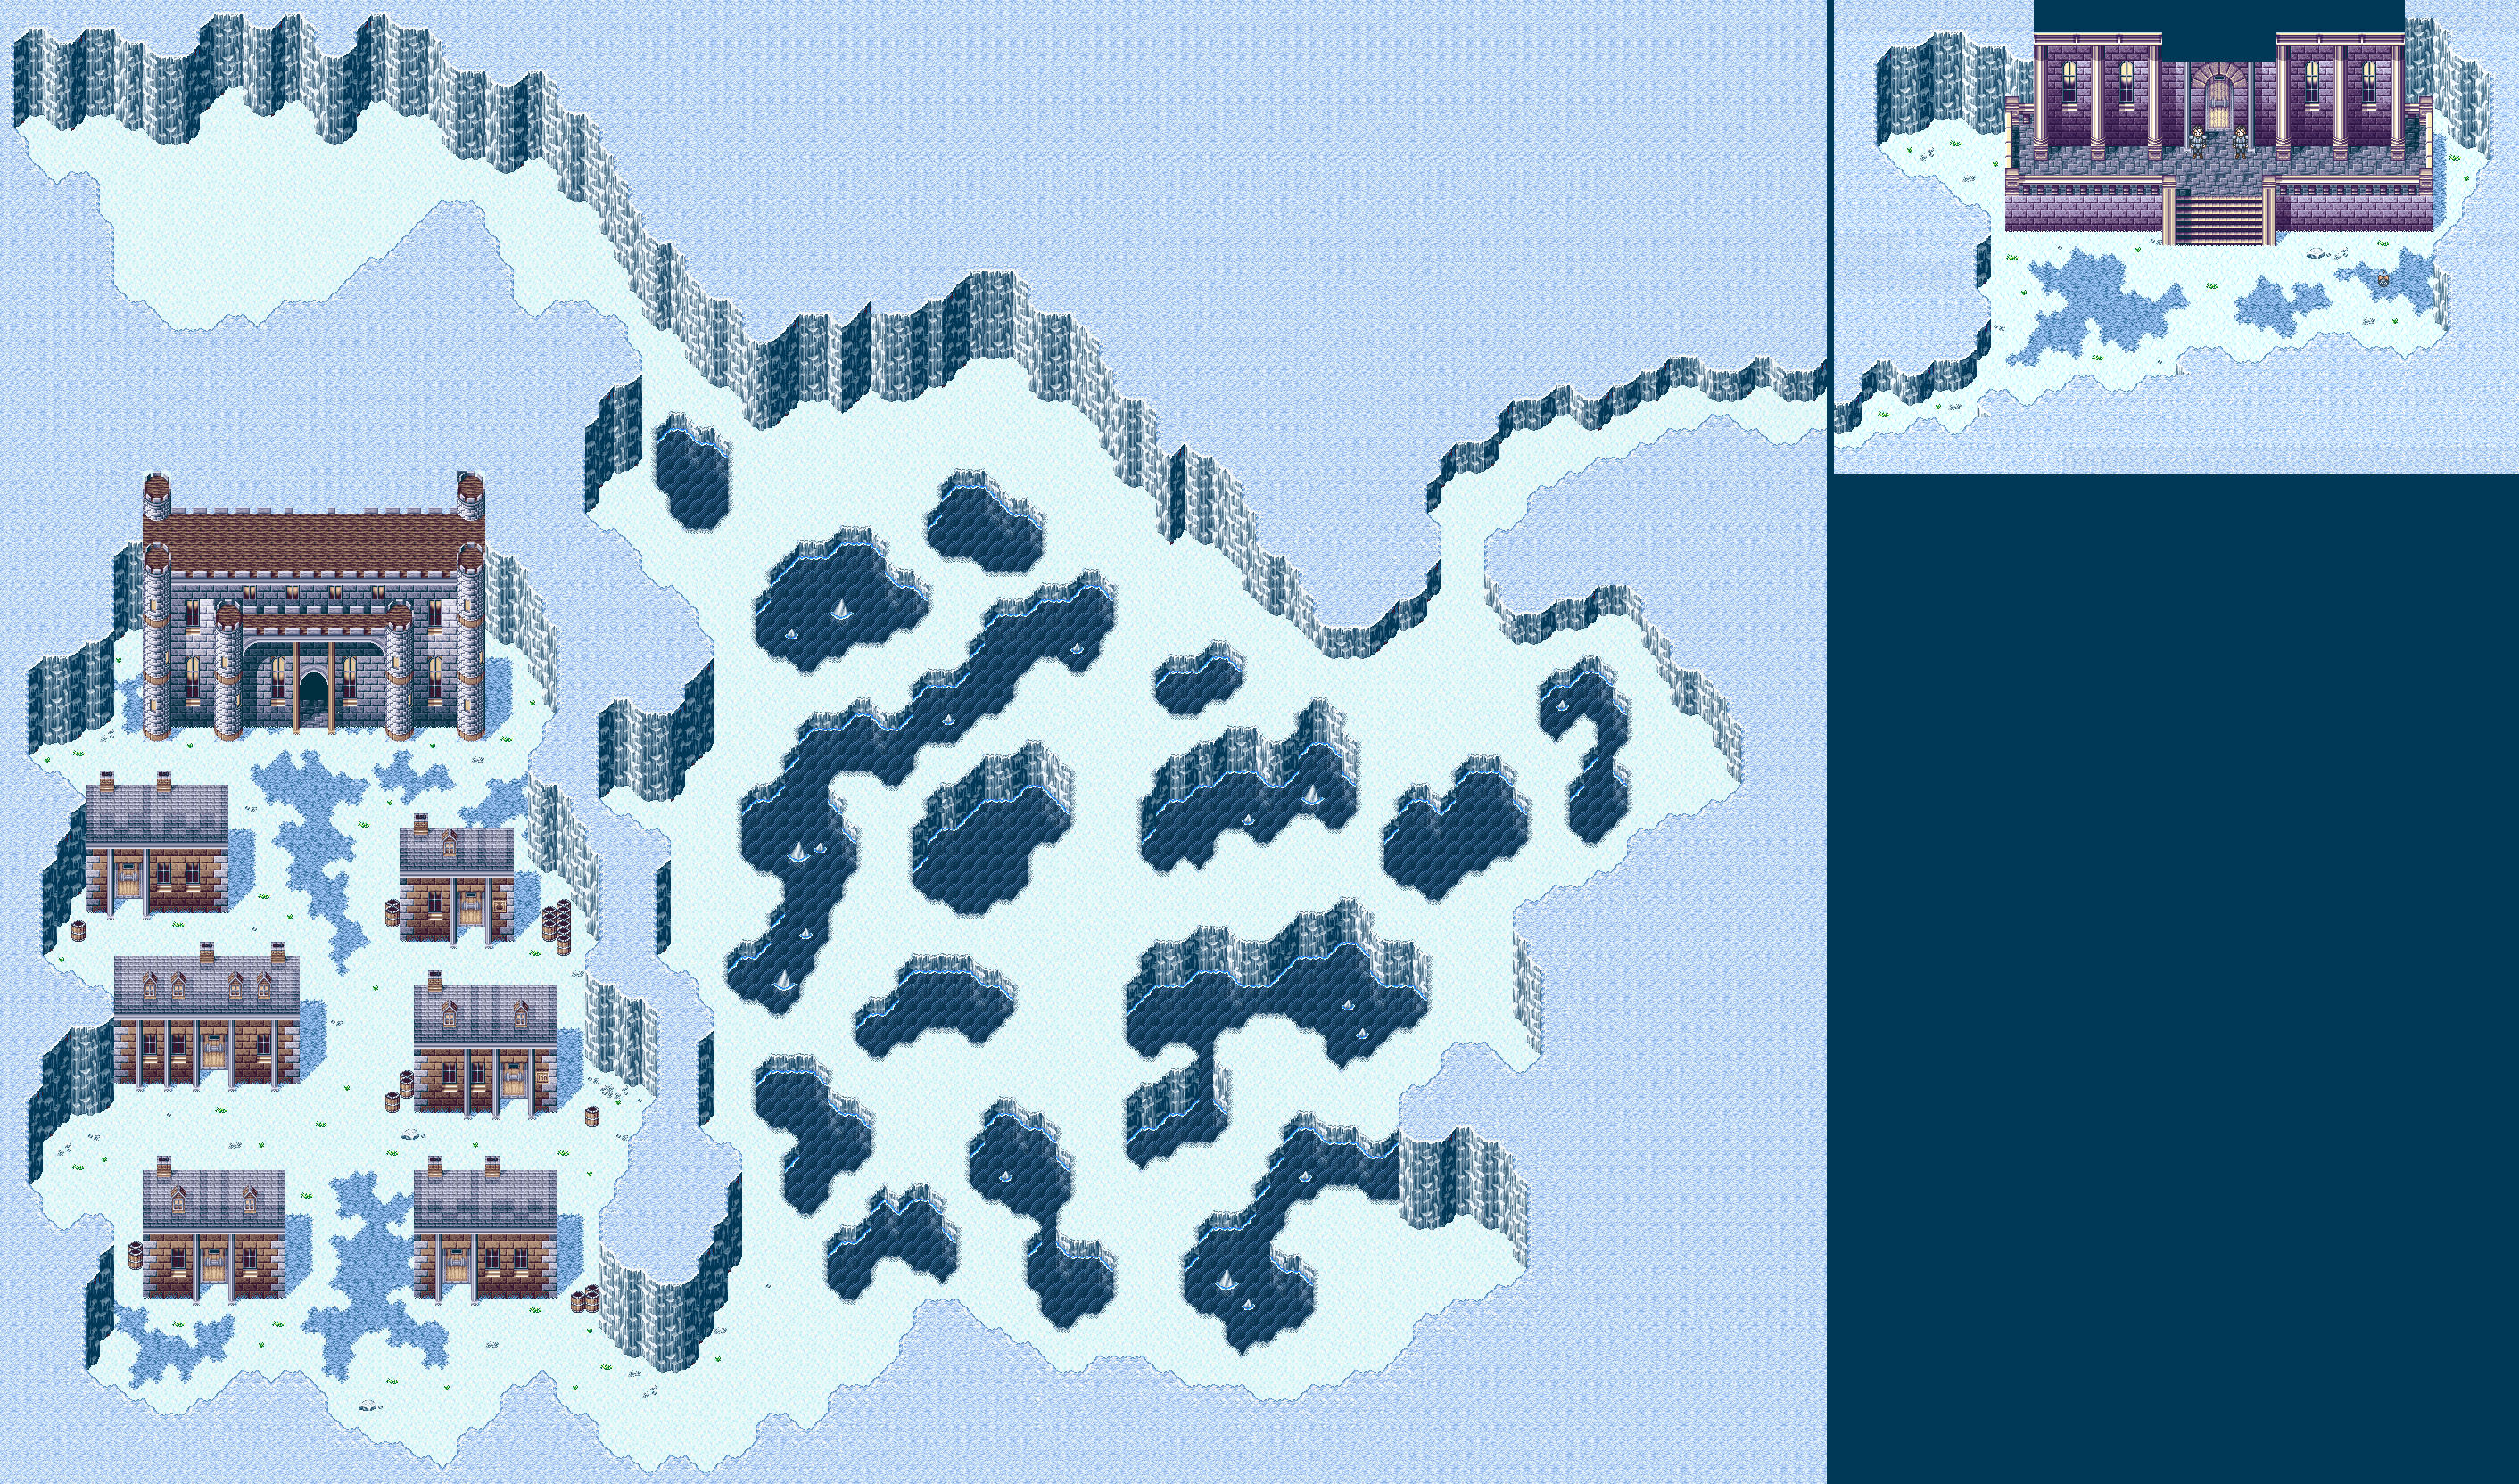
Time-Space Door Entrance
If you chose the party that I recommended, open up your menu and go to formation. Make sure Mars and ChibiMoon are at the back, while Venus and Saturn are at the front. Sailor Moon at the middle. It should be Cluster Formation. Go down and you will find a Luna-P. Save if you want.
Note: Random battles will occur here. I suggest you gain some levels. Get up to at least level 24 or more, and you'll be fine.
When you're done training, go up to the front door and you will be stopped by “Sailor Pluto”. She'll say that it's been a long time and Sailor Moon is glad to see her alive. Pluto will prompt Sailor Moon not to go inside the Time-Space Door since she has the Ginzuishou. Sailor Moon wonders why and Pluto answers that the door is full of evil energy. The Ginzuishou will be able to handle the evil power within. Sailor Moon reluctantly agrees that they should leave.
Pluto asks ChibiMoon by calling her “Princess” to give her Ginzuishou as well. Hearing this, ChibiMoon reacts and tells Sailor Moon that this person is NOT Pluto because Pluto never calls ChibiMoon “Princess”. Now exposed, Pluto takes off her disguise and unveils herself as Nergal! Mars will react (if you brought her along) and Nergal will tell the Senshi that her powers are much stronger than before.
Boss: Nergal
This is VERY easy if you chose the party that I recommended. I defeated her in one turn. Just use Death Reborn Revolution, Venus LoveMe Chain, Moon Spiral Heart Attack, Mars Fire Snake, and Pink Sugar Heart Attack. See how much benefit it does when you take the time to level up?
Rewards after winning: 300 EXPs, 5000 Yen, Life Can
Nergal complains about not being able to defeat the Sailor Senshi on her lonesome. But the Time-Space Soldier, Sailor Pluto, is in her hands. She is completely at Nergal's mercy! Nergal will be waiting at the Time-Space Gateway and with that said, she teleports off.
ChibiMoon wants to help Pluto and Sailor Moon agrees. Whatever happens, you can never abandon your friends (fact of life there!). Sailor Moon and the others will enter the Time Space Door.
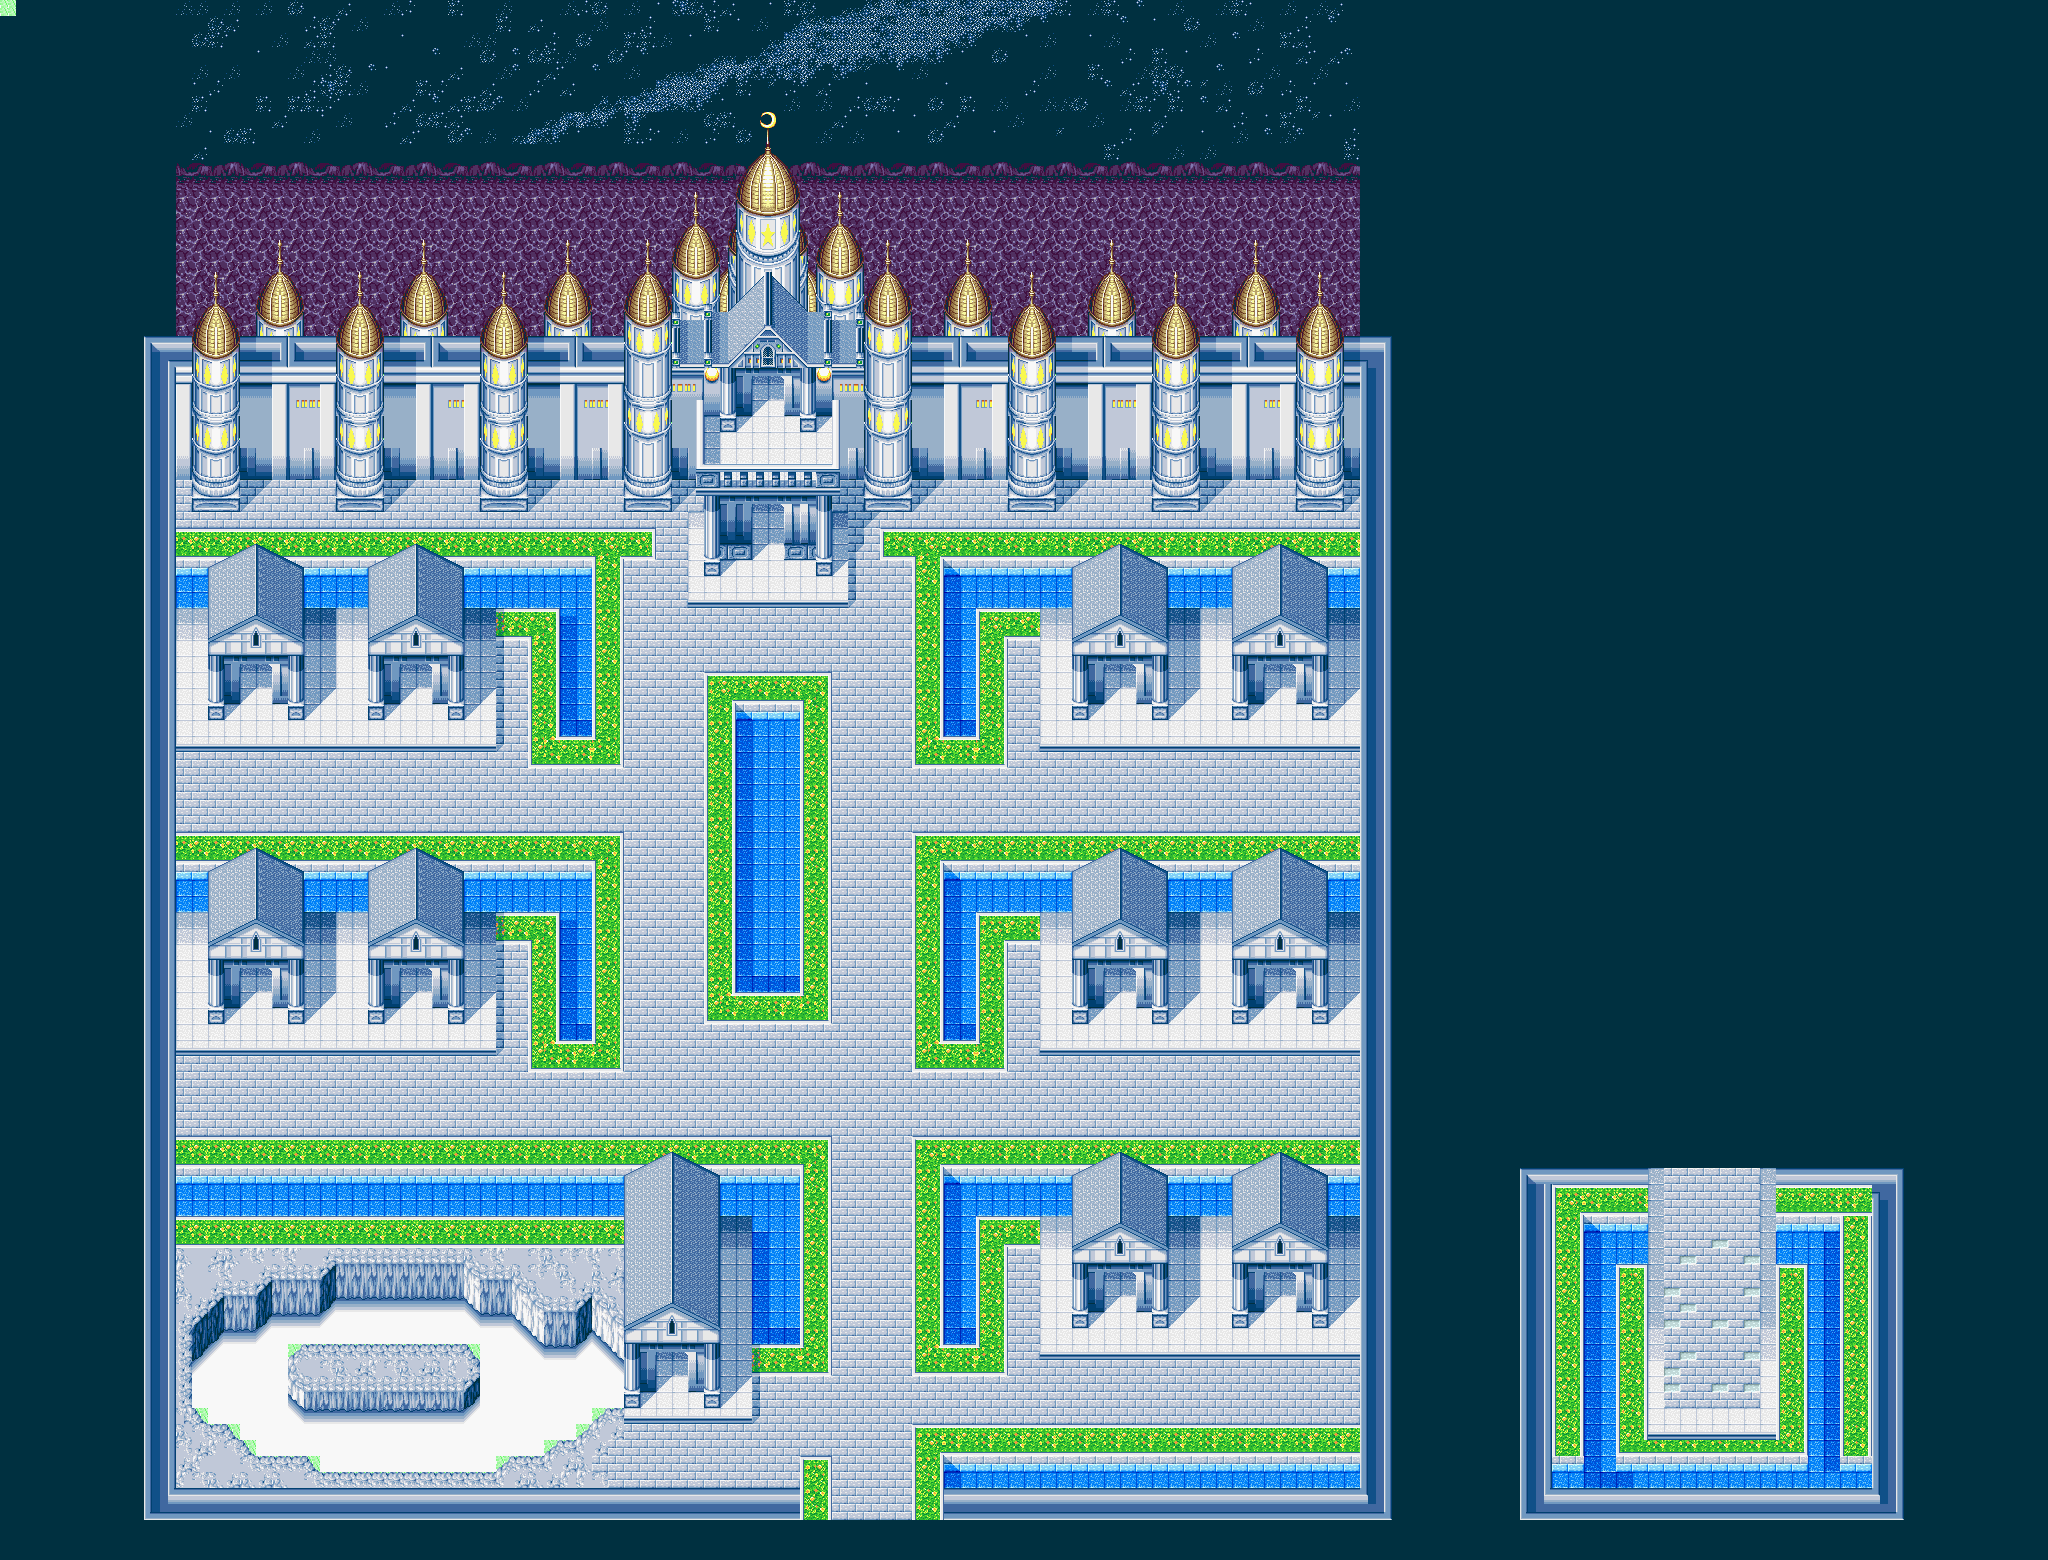
Inside Time-Space
 Tower of Time
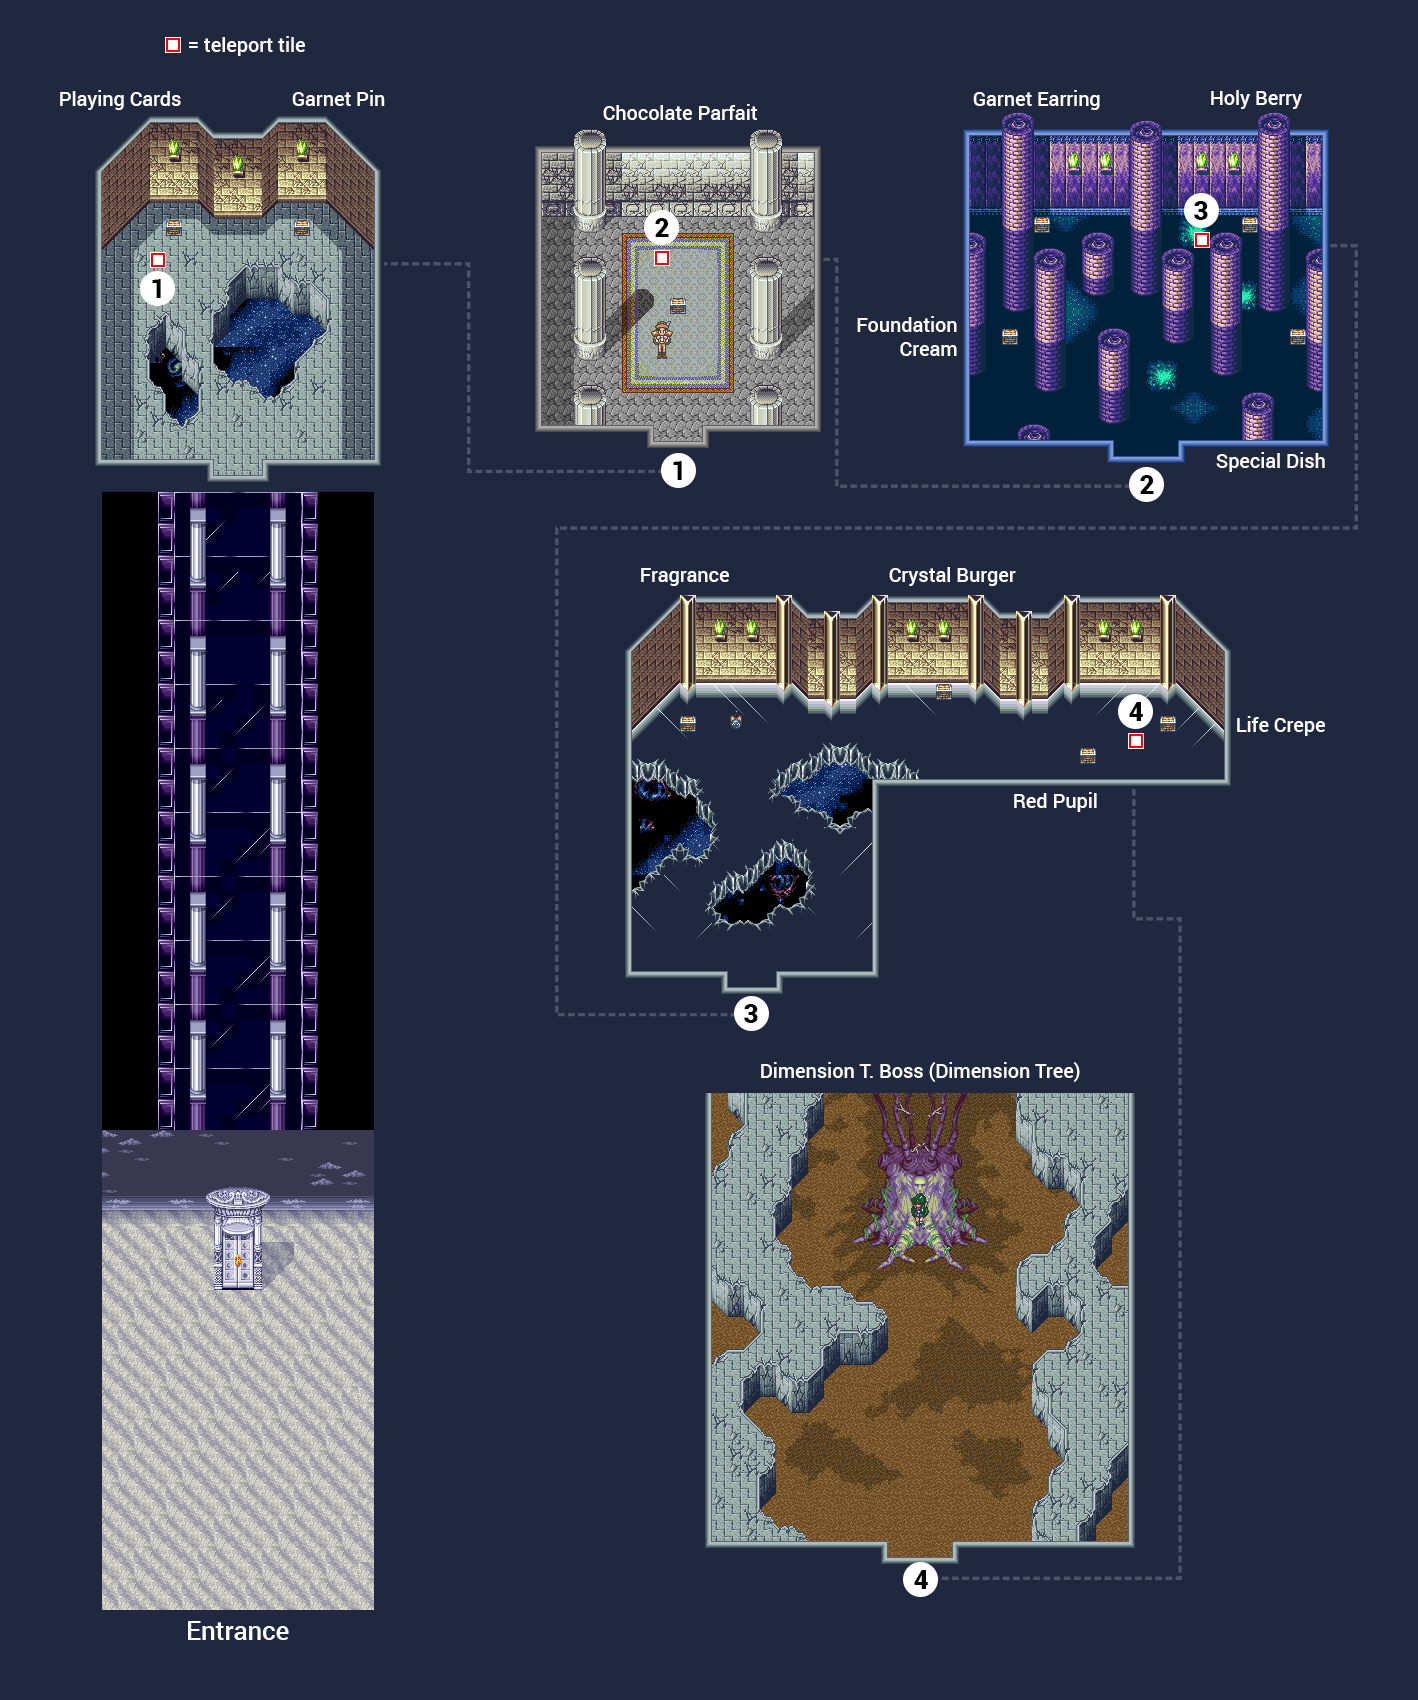
Wow, check out the colors! Keep going up, until you enter the next screen. Go up and you will see two treasure chests. One is on the left, while the other one is on the right. Examine the left chest to get another collective item, Playing Cards, and examine the chest to the right to get a Garnet Pin. Go to the now-empty chest to the left and stand directly in front of it. Take one step down, then one step left.
You will be teleported to a room with a traveling merchant and a treasure chest. Once again, the merchant will sell you EXTREMELY helpful items. Stock up on what you need. When you're done, open the chest that contains a Chocolate Parfait. Now exit this room by heading south.
You are back in the room with the two empty treasure chests. Go to the chest to the right where you got the Garnet Pin, stand directly in front of it, take one step right, then one step down. You will be teleported to the next screen.
Go up and you will see a door with two chests on either side. The left treasure chest contains a Special Cake and the right treasure chest contains yet another collective item: an Original Card. Now enter the door. Here, you could randomly be teleported from one place to another. But it's no biggie, as you can't get lost. Go right and you will find a treasure chest that contains a Holy Berry. Go left until you see a treasure chest that contains an F.Cream. Go up and you will find another treasure chest that contains Garnet Earrings. Go right, avoiding the light spot on the floor, and get the treasure chest that contains another collective item: Special Dish. Now step on the light spot and you will be teleported to the next screen.
Now go up and you will find a Luna-P and a treasure chest that contains a Fragrance. Save at the Luna-P, then go right and you will find another treasure chest that contains a Crystal Burger. Keep going right and you will see 2 treasure chests. First, open the chest that is near you to get a Red Pupil, which is a VERY useful accessory. I suggest equipping it to Sailor Saturn, making her even more powerful. Unequip the Anklet and equip the Red Pupil. Now, make sure you're standing directly behind the chest that had the Red Pupil. Go up one step, then go right and open the chest that contains a Life Crepe. Now take one step down and you will teleport to the next area.
The Sailor Senshi have finally found Pluto, who is being held captive by a weird tree. This tree is draining her energy and warns ChibiMoon that if she comes too close, she will be caught up by this tree. She tells the Senshi to take the Garnet Rod since there are lots of enemies grouped on Earth. If the Senshi use the power of people wishing for peace, even if Sailor Pluto disappears, the past will return to normal. But ChibiMoon doesn't want to leave Pluto behind.
Boss: Dimension T.
Too easy. Use Death Reborn Revolution, Pink Sugar Heart Attack, Moon Spiral Heart Attack, Venus Love Me Chain, and Mars Snake Fire. I won this battle in just one turn. Red Pupil is great!
Rewards after winning: 1200 EXPs, 10 Yen, HolyWater
Pluto will give her thanks to Small Lady (ChibiMoon) and the other Sailor Senshi. The Time-Space Door starts shaking and Pluto exclaims that if they don't leave, it will collapse! Pluto uses her powers to teleport everyone back home. The Tower has collapsed...
Hikawa Shrine
Well, all the Sailor Senshi are here together, but this is no time to relax. Luna says that the enemy still seems to be changing destiny in the past. Minako wonders if this tragedy is what caused the Silver Millennium to fall. Should they be changing it? It would be nice if they could all become people who lived on the moon again. But if that happened... Makoto gets mad and yells at Minako that the enemy is changing the world's destiny for their selfish ends. Don't they want to live in the world they do now? Does Minako hate everyone as they are now?! Makoto apologizes for yelling at her.
Ami states that whatever they do, the destiny they change will not be a pleasant one. Michiru says it would be a mistake not to take up their duty, and return the world's destiny to what it should be. Haruka says the opposite would be an empty existence and they can't just change what they want. They must use great force to change destiny, for better or for worse, to what it was before. Hotaru states that they can't change their histories to cover up their weaknesses.
Setsuna has noticed the enemy changing destiny without thinking of the repercussions. That is completely not allowed. However, to keep enemies from changing destiny, in an emergency they have to do whatever it takes to stop them from getting near the door.
Ami asks Usagi if she wants to say one last thing to Mamoru. Usagi answers yes, but she wants to know where the city of the Marle Serenitaties is first. Ami tries to computer scan it, but the data is not found. There's not much data about the Moon. Usagi decides to visit a bookstore to find out more about the Moon.
Exit the Hikawa Shrine and go down the stairs. Go left, until you enter the next screen.
The town of Juuban
Juuban
Go left, down, right, down, and keep going down until you see the “GAME Center” building. Now go left, past the GAME Center building, and you will see a building that says “Books”. Enter.
Go to the counter and talk to the man. He'll ask if you're looking for something and Usagi answers that she's looking for stuff about the Moon. He starts walking around the store, examining bookshelves, but he can't seem to find a book about the Moon. Eventually, he finds a book about the Moon and tells Usagi that it costs 1,000,000 Yen!!! Usagi goes ballistic as she yells “What!? How the hell!!!” (LOL!). But since the owner of the bookstore finds Usagi so cute, he reduces the price to 300 Yen, making this a fantastic deal. When the Yes or No questions appear, say Yes and you will have to get the book for 300 Yen!
The owner wonders why Usagi would want a book about the Moon. He wonders if she wants to become an astronaut when she grows up. He compliments Usagi on looking like a Moon Princess (he's right there) and thinks there must be some connection!
Now leave the bookstore. Go right, then keep going up (past the “Toydox” building), left, up, and keep going right until you enter the next screen. Keep going right, then go up the stairs and enter the Hikawa Shrine.
Hikawa Shrine
Go and meet up with the other Sailor Senshi.
Usagi tells Ami that she found a book about the Moon. Ami takes the book and tells everyone that she can now calculate about the Sea of Serenity. Ami soon finds it and proclaims that it is in Harumi, Tokyo. Usagi wonders why it's in Harumi and Ami says that's where the Moon Castle is. The Moon Castle existed in the Sea of Serenity on the Moon. “Sea of Serenity” means a clear ocean, and Harumi IS a clear ocean. Usagi the dolt is STILL confused, which causes Ami to sweatdrop. Ami says that if they can go there, they can travel back to the past.
Harumi
Note: We'll be coming back to Harumi again later on in the game, since this area contains some rare secret items.
Having arrived at Harumi, Minako says that there's no one here today. Rei says that there's no show going on around here either. Usagi says that here in Harumi, there's always a Sailor Moon show on (what?!). She wonders if the voice actors are taking a day off...(huh?) and tells Rei that it's bad luck. Rei gets irritated and suggests that they should look for Earth's Sea of Serenity for Mamoru.
Suddenly, Minako hears some kind of a sound. Everyone notices that the sound is actually from the Black Moon's UFO! Rei wonders if the Black Moon's destiny has been changed so they could be revived. Usagi remarks that Cooan and her sisters have been leading happy lives. All the girls transform into Sailor Senshi and Sailor Moon exclaims it's time to get on the UFO.
Uranus says that if they all get on the UFO, then no one can look for the Sea of Serenity. While the Senshi are on the UFO, history could change. Neptune agrees with Uranus and suggests that they should split into two groups. Uranus finds this to be efficient. So now, you are prompted to split into teams of five. I recommend choosing the Inner Senshi since you're supposed to bring them along. When your team is created, Sailor Moon will get on the UFO.
Black Moon's UFO
 Black Moon's UFO
Go up, up the stairs, and you will find a traveling merchant who will sell you useful items. I suggest buying plenty of Manicures, Cologne, and Bentou Set, since you will be needing them a lot. After you're done buying, you will notice 2 treasure chests, with one on the left and the other on the right. Examine them both to find an Aqua Bracelet and a Toilette.
Go down the stairs and go left to find a Luna-P. Save now, then keep going right and then up the mirror, which will teleport you to the next screen.
Open up the menu screen and go to Formation. Make sure you're in Cluster and that Mars and Mercury are at the back, while Jupiter and Venus are at the front. Sailor Moon is fine in the middle. Note: The random battles here will give you plenty of EXP, so I suggest you build up on your levels. Get up to at least level 30 or more and you'll be great. When you are done building levels, you will see two mirrors, one on the left and the other on the right. Choose the left mirror and you will be transported to the next screen. Keep choosing the left mirror until you come to an area where there is only one mirror right in front of you. Go through that mirror and you'll be in one more room that has 2 mirrors. Take the left one once again and a scene will begin.
The four Black Moon girls have been waiting for Sailor Moon. Sailor Moon asks why Petz has joined evil again. Petz answers that Saphir forced them back when he came back to life. Petz's sisters got all mixed up in this. If we beat Petz and her sisters, then they will be able to return to their destiny.
Sailor Mars asks Cooan about feeling true love. Cooan tells Mars that she doesn't like to fight, but their lives of fun won't change back while they are still in their destiny of fighting with the Inner Senshi.
Mercury wonders if beating Beruche will make her understand. They cannot choose whatever destiny they want. Beruche already understands, but she couldn't run away all by herself. She begs the Inner Senshi to defeat the four sisters.
Jupiter asks Petz if she wasn't happy before. Petz tells Jupiter to forgive them. The four sisters want to return to that happy destiny.
Venus tells Karaberas to feel the love. Karaberas exclaims that she can feel her sisters' love, but they regrettably choose this destiny. She begs the Inner Senshi to stop them. First up is Cooan.
Boss: Cooan
Cooan knows Dark Fire, which doesn't do much damage. Use Venus Love Me Chain, Mercury Aqua Mirage, Moon Spiral Heart Attack, Sparkling Wide Pressure, and Mars Snake Fire. Repeat these attacks and you will defeat Cooan. I defeated her in just 2 turns. If you run out of EP, use Cologne.
Rewards after winning: 1925 EXPs, 4000 Yen, Fragrance
Without giving you the chance to recover, you'll face Beruche next.
Boss: Beruche
Beruche knows Dark Water, which does good damage. Have Mercury is the healer in case anyone is low on HP and keep on attacking Beruche with your techniques. Venus Wink Sword, Moon Spiral Heart Attack, Sparkling Wide Pressure, and Mars Snake Fire. Rinse, lather, and repeat. Have Mercury use Cologne if you run out of EP.
Rewards after winning: 2125 EXPs, 6000 Yen, MoonShard
Next up is Karaberas.
Boss: Karaberas
Karaberas knows Dark Bute, which lowers a Senshi's HP by half! Make sure you use Mercury as the healer and have everyone else go for the offensive. Venus Wink Sword, Moon Spiral Heart Attack, Sparkling Wide Pressure, and Mars Snake Fire. You'll win.
Rewards after winning: 2725 EXPs, 7000 Yen, Yaga Soup
And now, the final sister!
Boss: Petz
Harder than the other 3 but still, you can defeat her. Petz knows Barrier, which can petrify one or maybe ALL the Sailor Senshi! Use a PorkChop if one or more of your characters become stoned. If ALL of your Senshi become stone, it's game over! So be VERY careful. Petz also knows Dark Thunder, which is a powerful move that could kill Sailor Venus. Make sure to heal her using LifeWater and use Bentou Sets if you're low on health.
From the start of the match, have Mercury use a Manicure on Sailor Moon, and have everyone else use their techniques. With a powered-up Sailor Moon, use the MoonCup1 to make her even stronger. Then use Rainbow Moon Heart Ache. If you run out of EP, have Mercury use Cologne. Just repeat with your Senshi's techniques, with Mercury as the healer, and you will this battle soon. Good luck!
Rewards after winning: 2925 EXPs, 8000 Yen, Life Can
Sailor Moon apologizes for hurting the ones that she loved. And not to let anyone be killed. As time goes by, people's lives could be ruined, like Cooan and her sisters. Sailor Moon doesn't want to fight to do stuff like that to people. Luna abruptly sends Sailor Moon a transmission, telling her that they have found where the Sea of Serenity is. Luna tells her to get out of there quickly, but Sailor Moon wonders how they'll get back to the ground. Luna says that the room they are in now has a doorway, which leads to the ground. We can return through there.
Go up and you will be prompted if you want to go back to the ground. Say Yes and you will exit the Black Moon UFO.
Harumi
Sailor Moon asks Luna if she's found where the Sea of Serenity is. Luna answers yes and tells the Senshi to follow her. Meeting up with the other Senshi, Luna points out its location. Sailor wonders how they can go back to the past and Pluto answers that everyone's powers must be combined first. All of the Senshi unite and their powers teleport them to the past!
The scene switches over to Apsu's headquarters. Apsu is feeling ill, as her breasts hurt. Even in her present life, the never- ending Ginzuishou follows her. She calls for Anshar. Anshar appears and Apsu tells him that Demando of the Black Moon has gone scrambling to the past with the Barazuishou. Anshar is surprised and Apsu says that the Sailor Senshi are also about to go to the past. If by any chance the Sailor Senshi get their hands on the Barazuishou, they won't be able to change destiny. Anshar asks if there is a way to stop them. Apsu tells him that they don't need to get back the Ginzuishou, so he can meet up with Small Lady.
Anshar wonders why the Ginzuishou won't be needed since it's powerful and unstoppable. Apsu replies yes, but in the time that Sin and her friends have gone, the Ginzuishou is still in pieces in the 7 pieces called the Nijizuishou. If they were to get but one of those and keep it, destiny would certainly change massively. With 7 pieces the Ginzuishou can be revived, but with 6 pieces, they can control the reviving. Anshar says that its power would become weak.
Apsu tells Anshar that his and Small Lady's social differences would disappear completely. But on the contrary, a future where Anshar can have new lovers would open up. Anshar understands and will tell Sin about the 7 Nijizuishou. Anshar's mind starts speaking, as he wonders why Apsu is reviving things like the Black Moon. Surely, this time Demando is more than a match for Sin and her friends.
Apsu tells Anshar that he may be able to use his power if she gets separated from this time. Anshar understands. With the power used to resurrect Apsu, the past destiny shall not return. Apsu doesn't have the power to cross time and Anshar is the only one who possesses that power. Thanks to that power, Apsu has been able to see the destiny of the past. She starts coughing and Anshar asks if Apsu is alright. Apsu says that if she can get the Ginzuishou, then her pain will disappear. Anshar makes up his mind and goes to the past.
A flashback scene ensues, where we see civilians in Crystal Tokyo running away from the Black Moon disturbance. We soon see Anshar and Sin. Anshar cries over the deaths of their mom and dad. Sin is upset and wonders why the Sailor Senshi didn't come to help them. They have the power to fight the Black Moon. There are no Sailor Senshi. Apsu's voice starts calling out to Sin, asking if she hates the Black Moon. Sin hates it, as well as the Sailor Senshi. If they had helped, then their parents would still be alive. Apsu shrouds Sin's mind with words of confusion as she tells her that the Senshi value the Ginzuishou over people's lives. Apsu manages to convince Sin into joining the dark campaign after giving her powers. Sin accepts, but she wants Anshar to come along too. The 2 tractor beams elevate the siblings up. Upon elevating Anshar, Apsu senses a great power within him... The flashback ends.
Apsu's downfall was prevented because Anshar was there. She asks for the Ginzuishou before her life disappears.
The past
Upon their arrival in the past, the Senshi are tired after using their powers. Saturn wonders where they are and Uranus answers that they are on the Earth of the past. Neptune comments on how peaceful it seems.
Suddenly, Radina appears and greets the Sailor Senshi. She says that they have been waiting for the Senshi to arrive and asks for them to follow Radina to her house. The Senshi have spent a lot of energy changing Time-Space, so it would be a good idea if they rested. Uranus suggests that they should follow her to her house. Sailor Moon agrees but says that they shouldn't follow people they don't know. That's what her mom used to tell her... but Radina seems to be a gentle person.
Venus says Radina is ok. She has met her before, but she was a ghost then. Uranus tells everyone that they should go and so, everyone but Sailor Moon follows. Sailor Moon notices that her friends are gone, so she quickly follows them.
The scene switches over to the Oppositios. Sin says it's pointless since the Sailor Senshi have probably snatched the Barazuishou from Demando. Nabu wonders where he ran off to. Nergal apologizes for not being able to scare away the Sailor Senshi. Isthar exclaims that the Barazuishou won't fall into the hands of the Senshi. Marduk argues that they shouldn't go to change destiny. It would be a fool's errand. Nabu says it can't be helped. If they were to change destiny in this time, they would disappear. Marduk starts squabbling with Sin, exclaiming that it's Sin's responsibility to get the Barazuishou. Nergal tells Marduk that they don't have time for bickering. Sin suggests that they should go look for Demando. With that said, the Oppositios teleport off.
Sariel Village
 Sariel Village
At Radina's house, Radina tells the Senshi that their arrival here at this time has been prophesied. Uranus says this is cool. If destiny changes, maybe they can have Radina predict what's going to happen. Radina answers that a sage like her can do such a thing, but so can Beryl! Sailor Moon wonders if it could be the same Queen Beryl. Radina tells the Sailor Senshi that this is the beginning of their journey, so they should use her house freely for whatever they need. Radina says she'll be at the Temple of Venus and so, she leaves.
Sailor Mars exclaims they should look for the Barazuishou now. Neptune suggests that they should split into groups since it will be too suspicious if all of them move around like this. Luna agrees and she asks Sailor Moon to form a group. ChibiMoon exclaims that she has to go. She must get the Barazuishou as well. Mars remarks that ChibiMoon is so much like Sailor Moon and Venus states that they are mother and daughter. Time to choose members.
I would suggest bringing along Venus, Saturn, and Uranus. You can't dump ChibiMoon, so you're going to have to make full use of her in battles.
When you are done choosing members, Luna will say that if you feel like changing Senshi then you should come back to Radina's house. Artemis will be waiting for you. Artemis abruptly enters and says he's been doing some investigations, but now that they are here they should do some more. Luna announces that Artemis will be waiting here for everyone to return. Artemis is reluctant but agrees.
When you're in control of Sailor Moon, you can explore the town. It's been a long while since we've been here (during Venus' scenario). When you are done exploring, exit the Sariel Village.
Outside the village
Open up your menu screen and go to Formations. Make sure ChibiMoon and Uranus are at the back, while Venus and Saturn are at the front. Also, make sure it's Cluster Formation. Now exit the menu so we can move on.
Go right and you will see an intersection that goes either up or right. Choose to go right and follow the path until you come across another intersection - up, left, or right. Go up and you will be stopped by Rubius.
Rubius exclaims that the Sailor Senshi will die this time! He notices Rabbit (ChibiMoon) and says it's been a while. ChibiMoon asks why he has become a puppet of the Oppositio Senshi. But Rubius claims that he is not on their side. Sailor Moon asks him about the Barazuishou, but Rubius will want to pick a fight with you.
Boss: Rubius
Rubius is hard. He has excellent defense, making it difficult for you to damage him significantly. He loves to use Illusion, which will make things even harder. He also knows WhirlWind Cut (which could kill Uranus), and Sonic Wave.
From the start of the battle, have ChibiMoon use a Fragrance on all your characters, which raises attack. Then use MoonCup1 to turn Sailor Moon into Super Sailor Moon and use Rainbow Moon Heart Ache. Use ChibiMoon as a healer and have Uranus use World Shaking, Saturn use Death Reborn Revolution, and Venus use Love Me Chain. Saturn and Venus are your keys to victory because as soon as they are upgraded with a Fragrance, their techniques will do extreme damage. If you run out of EP, use Cologne to recover. Heal if your HP is below 130. Good luck!
Rewards after winning: 1800 EXPs, 5000 Yen, Yaga Soup
After the battle is over, Rubius dies. Go right and enter the cave. Go up and step on the yellow platform. You will be asked if you want to get on the Ark. Say Yes.
The Ark
 The Ark
Go right to enter inside the Ark.
Sailor Moon asks where they are right now. Venus answers that they are in the control room of the Ark. Sailor Moon wonders how they can operate it and Venus says that they use the round crystal that's on the controls. Venus recommends Sailor Moon pilot the Ark, but she doesn't know if she can. Venus tells Moon to touch the crystal. The Ark abruptly starts moving upon Sailor Moon's touch of the crystal! You'll have control of the Ark now!
I will explain how to pilot the ark:
- Up = Make the Ark go forward
- Down = Make the Ark go in reverse
- Left/Right = To steer the Ark
- D (L) = Move the Ark left sideway
- C (R) = Move the Ark right sideway
- X (A) = Land the Ark at a particular city/village (Rias, Medias, etc.)
- A (Y) = Ark will ascend and arrive on Silver Millennium
- S (X) = To open the world map
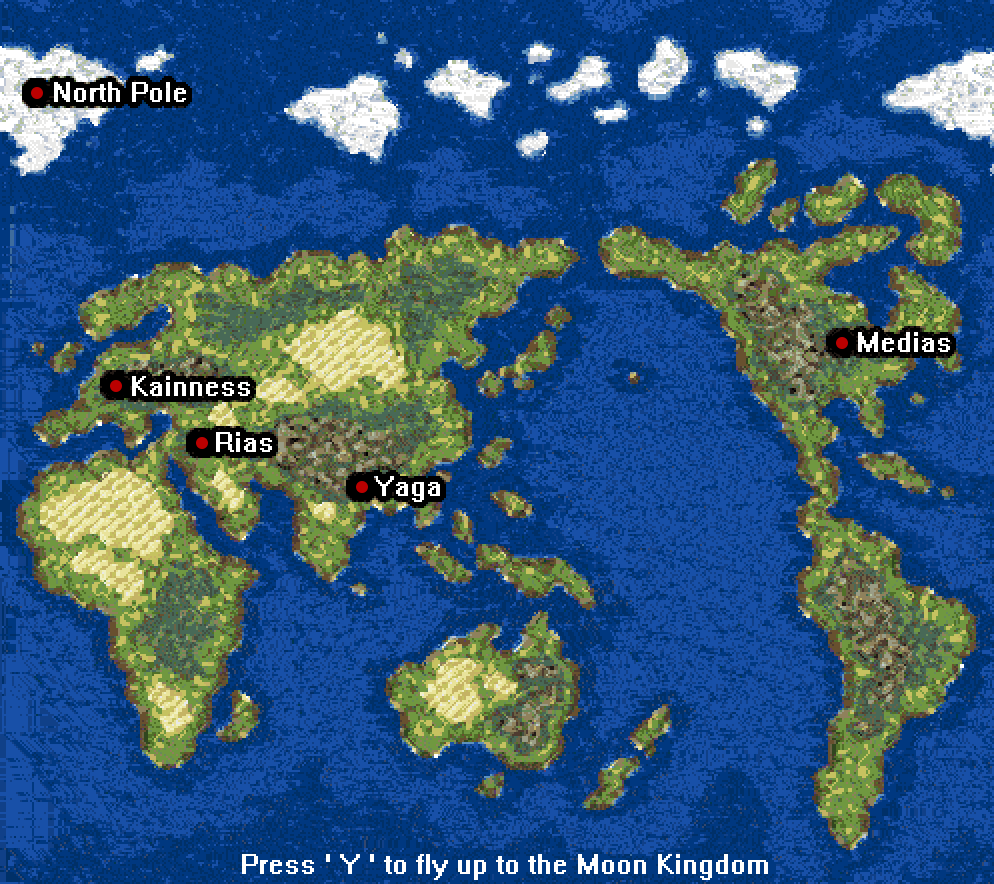 World Map
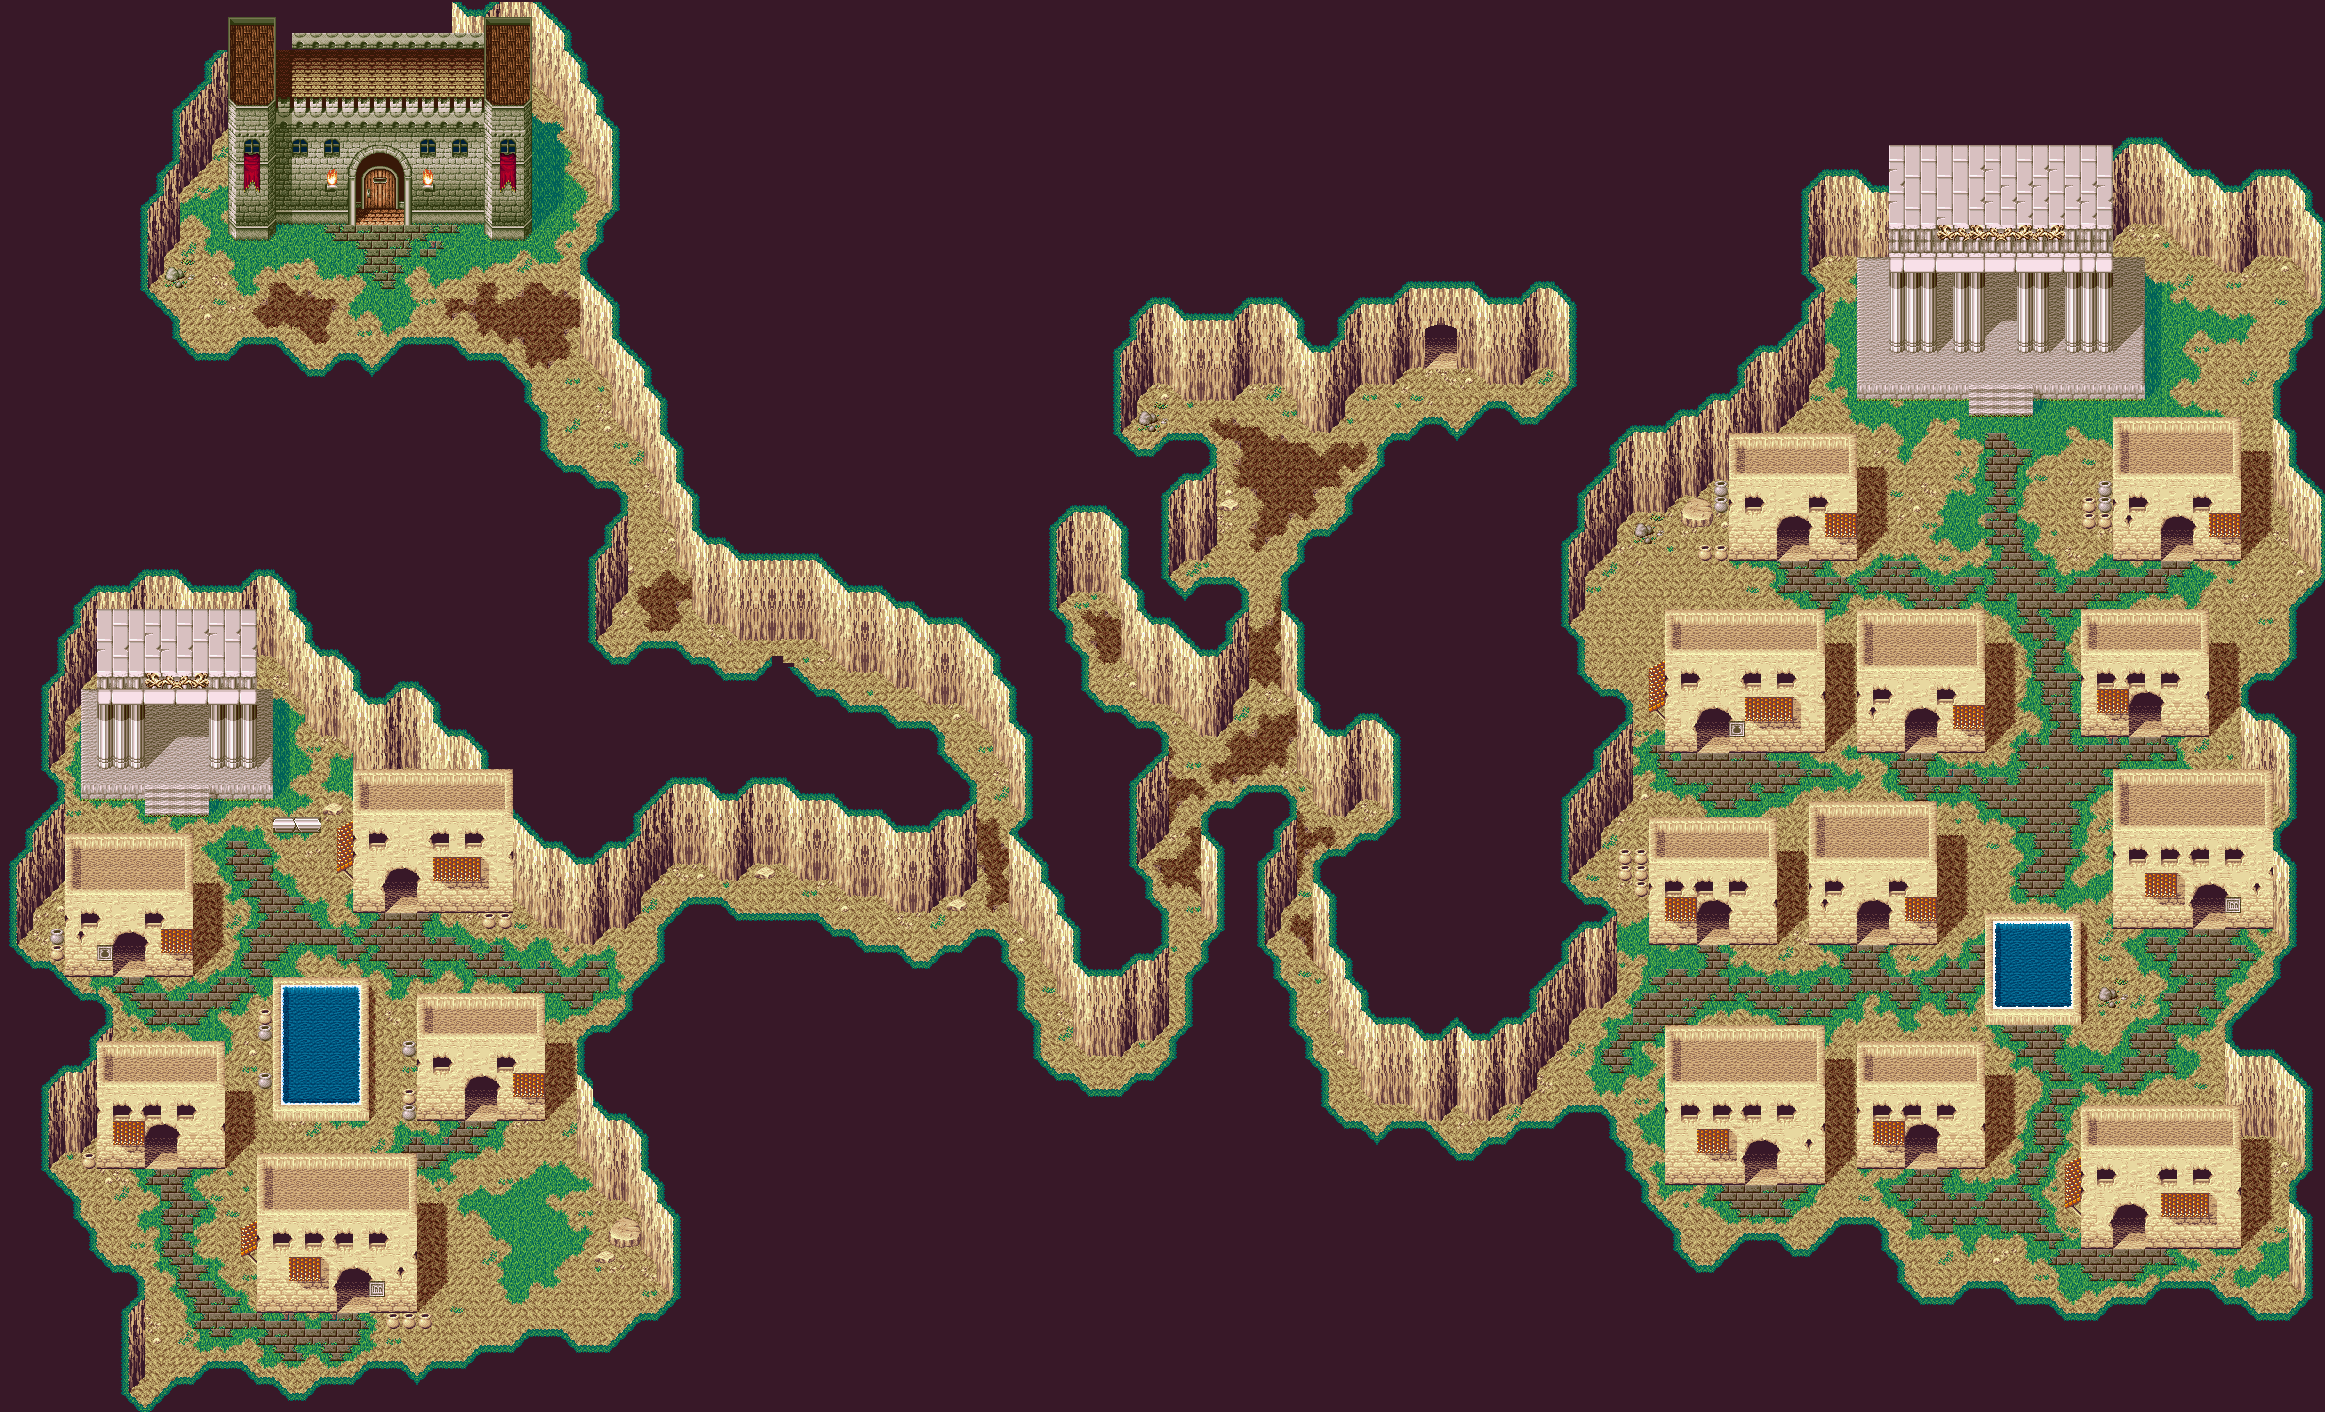
When you are done getting adjusted to the Ark's controls, fly to a place called N.Pole, which is northwest from Rias.
North Pole
Open the menu screen and go to Formations. Make sure you're in Cluster and switch Sailor Moon to the front by selecting Sailor Saturn. Saturn should be in the middle this time. If you brought along Sailor Mars, she does particularly well against the monsters here. Make sure she's fully equipped with the best gear before putting her at the front.
 North Pole
Note: The random battles here are pretty tough. I suggest you gain some levels to get stronger. Getting up to level 35 or higher is great, but you don't have to. Just be careful.
Go right and follow the path. You will see a treasure chest on your left, so go pick it up to get a Life Can. Keep going right, following the path, until you come to an open area. You will see a treasure chest on the right, which contains a BathMedic. Now go up and follow the path until you enter the next screen.
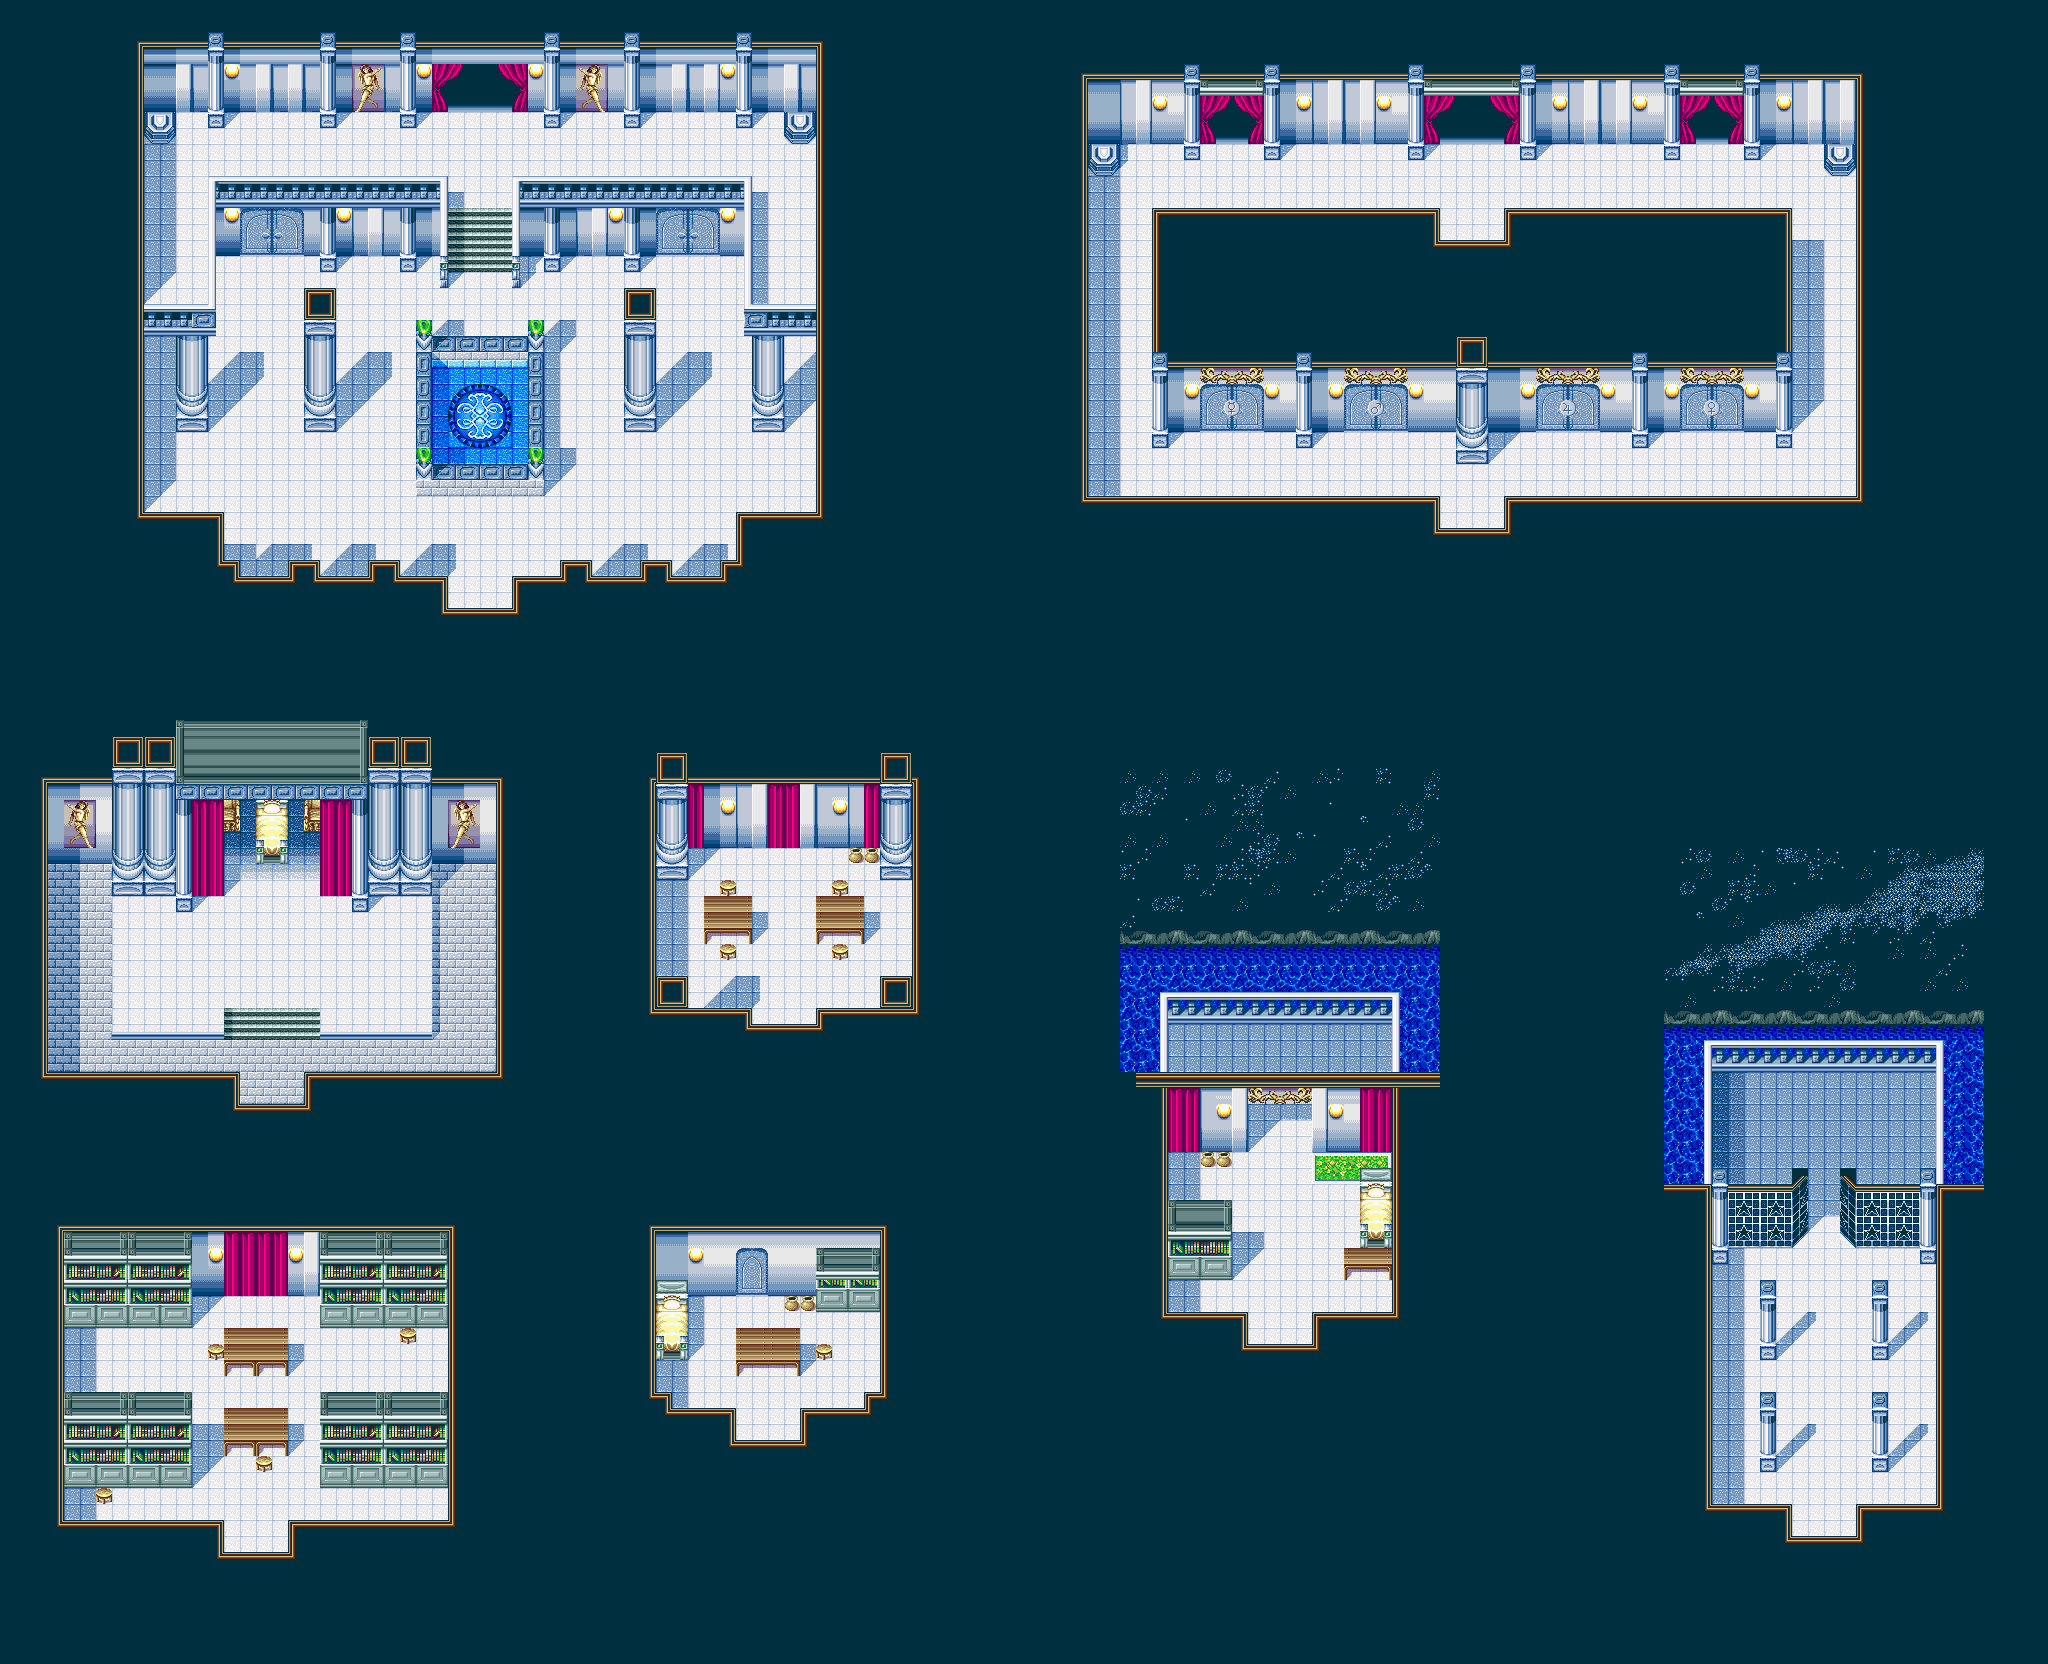
Beryl's Castle
 Beryl's Castle
Go right, up, and go to the left side of the castle to find a treasure chest that contains a Fragrance. After getting the item, go right and you will find a Luna-P. Save now, then go up the stairs of the castle and try to enter.
The guards will refuse to let you in and so, Sailor Moon calls the guards “tightwad!” before leaving. At the left side of the castle (where we found the chest), Sailor Moon wonders what they can do now since they can't enter the castle. Luna prompts her to use the Disguise Pen. Sailor Moon complies and asks for the Pen to transform her into a servant. She transforms into a servant and Luna says that they'll be waiting for her.
Usagi, as a servant, tries to enter the castle but is stopped by the guards. They will go “gaga” over her but they let you enter the castle this time.
Go up, left, and enter the door. Go left, then up the stairs. Go up, right and you will find a treasure chest that contains a Holy Water. Go left and down the stairs. Go down, right, and down to exit.
Now just go right and enter the door. Go up the stairs. Go up, right and you will see a Luna-P. Save if you want, then proceed by entering the door.
Go left and you will see a treasure chest that contains a Fragrance. Now go right and you will find Queen Beryl!
Beryl misses her love, Prince Endymion, and starts crying. She wants Endymion to become hers. The people of Earth are not being led away by the evil power of that comet. Beryl wonders why these people won't become hers. Suddenly, Beryl hears someone and Usagi-the-servant enters the scene.
Beryl remarks about Usagi looking like someone she knows. She asks for Usagi's company and Usagi answers yes. Beryl proclaims the evil comet is approaching. Because of it, evil powers have begun to break out on Earth. And soon, the meteor shower will fall. It must be an unlucky sign. In time, the God of Darkness shall awaken. Usagi wonders who that could be. Beryl states that if it does wake up, and if the God of Darkness is not captured... If Beryl doesn't, it would be better if they were all to be destroyed. The Moon Kingdom, the Earth Kingdom, Beryl, and everyone... That person in any form would be ok, so Beryl wants to harness that power.
That's what Beryl thinks the dark power shall do. Can that meteor's power be used to influence? Usagi tells Beryl directly that if love is captured with evil power, then it's not true love. She tells Beryl not to give up. Beryl gives thanks to her servant. She thought Usagi would say the same thing as that person Beryl thinks she looks like. Beryl tells her servant to leave afterward.
Go down and you will notice two treasure chests. Pick them up both to get a White Rose and a Filamis Cake. Now exit Queen Beryl's room.
Go left and down the stairs. Keep going down to exit the screen. Go left and down to exit the castle.
Usagi meets up with the others and reverts back to Sailor Moon. Luna asks what she has just found out and Sailor Moon answers not much. Beryl doesn't seem to know anything about the Barazuishou. But Beryl talked to Sailor Moon about something. Maybe if the Senshi could stop Beryl right now. But the thought of that scares Sailor Moon. Luna states that they can't let anyone change what destiny has guided the people of this time into. Everyone, in this time, has struggled so hard to change stuff. There is a history that everyone knows. If they did anything to change destiny, it would surely have very sad consequences.
ChibiMoon comments on it being scary and Saturn remarks that Beryl isn't an evil person after all. Beryl is worried too. Uranus says it's bad luck, after all, they've seen here. Luna says the Oppositio Senshi are going for their wishes from their time. It would be wrong not to struggle with all their might. Luna suggests that they should leave now. It is heart-breaking, but they can't alter destiny.
Go down, left, and exit the screen.
North Pole
North Pole
Go left, down, right, down, left, down and you will find a treasure chest that contains a Confetti Candy. Go left, down, left, down, and keep going right until you see a chest in a big space. Open it for an Amber Tiara. Now go back left, up, left, and keep moving up. Turn at the left narrow path to find a chest that contains a Bentou Set. Go down, left, down, then keep going left and you will enter a town. Earth Palace - Town Go north of the town and enter the Earth Palace castle.
Earth Palace - Castle
Upon entering, the people in the castle will assume that Sailor Moon the Moon Princess has arrived here.
Earth Palace - Town
Luna quickly tells Sailor Moon to exit the castle. Luna tells her that the people in this palace know Princess Serenity. And so, Sailor Moon shouldn't wander around inside looking like a Sailor Senshi. Sailor Moon uses the Disguise Pen and transforms herself into a servant again. Luna agrees that her disguise is perfect.
Earth Palace - Castle
Go up and left to enter the next screen. Go left and you will see a Luna-P. Save now, then go up and enter the door. You will see four doors in here. Go inside each one to find the four generals in one room - Kunzite, Zoicite, Nephrite, and Jadeite. Speak to them all, then exit this room with the four doors.
Go down, right to exit the screen. Go right, then up. Keep going up and you'll trigger a scene.
What the people say here is rather interesting, so I'll copy out their dialogues:
- Guard 1: “Is there a need for us to be always guarding the Moon Family?”
- Guard 2: “Hmm, I am friends with the people of the Moon, and they are wondering if they should continue the relationship they have now.”
- Guard 3: “Well... If we broke off the relationship we have now, there would be the problem of living in peace...”
- Guard 4: “At any rate, if we follow Beryl-sama, no problems should arise.”
- King: “Hmm, yeah... Let's leave worrying about the comet to Beryl. We should devote our energies to deciding whether to continue our relationship with the Moon.”
You probably have noticed that there are two treasure chests near the King's throne, but we cannot get them right now. So just leave and exit the castle.
Earth Palace - Town
Usagi reverts to Sailor Moon upon exit. Keep going down, then go right to exit the town.
North Pole
Go right, and keep moving up until you come across an intersection - left or up. Go up, left and you will find the yellow platform. Step on it and board the Ark.
When you're on the Ark, press A (Y) and you will be transported to the Silver Millennium
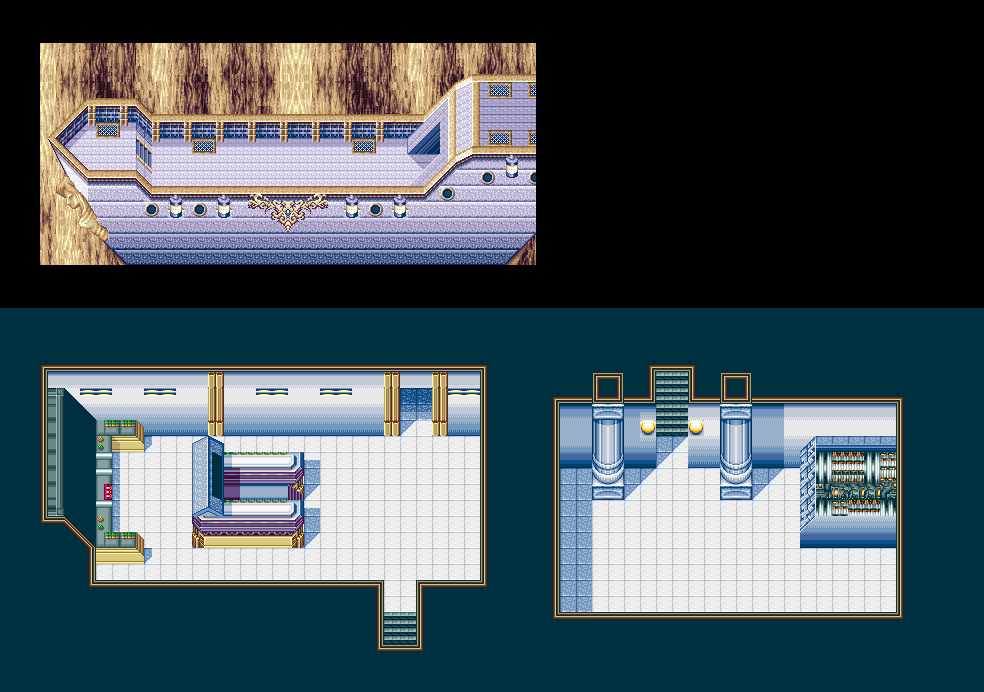
The Silver Millennium
 Silver Millennium
Luna tells Sailor Moon that she can't wander around the Silver Millennium as a Sailor Senshi. She should use the Disguise Pen. Sailor Moon uses the Disguise Pen to turn herself into a servant once again.
You will see a Luna-P. Save if you want, then proceed by going up. You can explore this place if you want, but there isn't much to do. Keep going up, then left, and enter the castle.
The Moon Kingdom
Go up, left, up, right, up the stairs, and keep going up to enter the next screen. Go left and enter the small room with the curtains. This is Princess Serenity's chamber. Go up and you will spot two treasure chests on your left. Pick them up to get a Red Rose and a Diamond Bracelet. Equip the Diamond Bracelet to Sailor Moon by unequipping the Bracelet. When you're done, exit the room.
 Moon Kingdom
Go right and head through the big, middle opening with the curtains. Now keep going up and you will encounter a scene with Prince Endymion and Princess Serenity of the past.
Endymion says that Beryl has brainwashed the people of Earth. She's planning to conquer both Earth and the Moon. Princess Serenity understands and Endymion exclaims that they cannot hold back, whatever happens.
If you try going up to meet with them, Luna will stop you and say that they should be discreet. So go down and exit. Go down again to exit this screen. Now go down the stairs, then go left, and enter the door.
You are inside the Queen's Chamber. Go up to trigger a scene.
Queen Serenity asks why Princess Serenity is wearing servant clothes. But she soon realizes that Usagi is not the Princess. Usagi takes off her disguise, revealing herself as Sailor Moon. Sailor Moon introduces her daughter, ChibiMoon, to Queen Serenity. ChibiMoon introduces herself as Chibi-usa and the queen comments on how cute she is. Queen Serenity gives her thanks and says that this meeting shall only stay in her heart. Sailor Moon tells Queen Serenity to take care and with that said, she runs out of her chamber.
Sailor Moon knows that Queen Serenity is going to die and she cannot change destiny. Luna tells her that the queen knows this as well. They just can't change destiny into what they desire. Remember, Queen Serenity chose to sacrifice herself. Sailor Moon knows that and is dismayed that the queen will sacrifice herself to save everyone else. Sailor Moon suggests that they should find the Barazuishou now.
Go back to Queen Serenity's chamber. Go up to the queen's bed and you will see a curtain left and right. Go into the right curtain, go up, press X (A) and you will find a Rainbow Ribbon. Now go into the left curtain, go up, press X (A) and you will find a Rainbow Feather. Equip the Rainbow Feather and a Tiara/Anklet on Sailor ChibiMoon. The Rainbow Ribbon is a very useful accessory since it protects a character from ALL status ailments! When you're done, exit the queen's chamber and exit the Moon Kingdom.
The Silver Millennium
Look for the item shop by going from building to building. Stock up on some useful items such as Bentou Set and Moon P. When you are done, go back to the yellow platform and step on it to board the Ark. Once you're in the Ark, fly to Kainess Village and land.
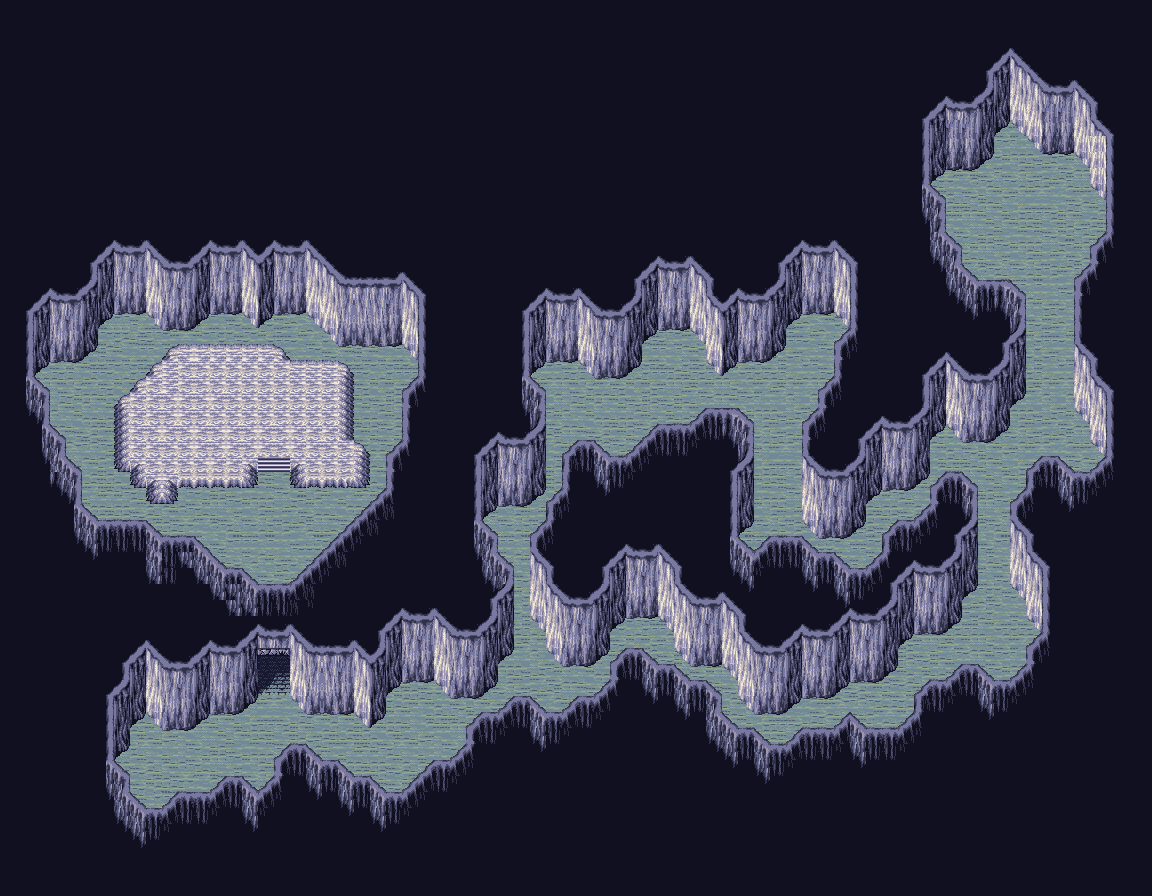
Outside the village
Note: This is a sidequest mission, meaning you DO NOT have to complete this if you want to beat the game. If you don't want to do this side quest, then ignore this section. Otherwise, read on.
I'm sure you remember this place, right? This is where we did Sailor Mercury's scenario. Go left, up, and follow the path until you come across an intersection - up or right. Go up and follow the path until you see the front entrance of that cave. Don't go in though. This time, continue going up and follow the path until you see a different entrance. Enter it.
Cave - Back Entrance
Go up and then go down the stairs. You will be facing off against the Dragon.
Boss: Dragon
The Dragon is pretty tough. It knows Tempest, which does very good damage. Have everyone, except ChibiMoon, defend in the first turn. Have ChibiMoon use a Fragrance on all your characters. On the second turn, use the MoonCup1 to change Sailor Moon into Super Sailor Moon, and have Uranus, Saturn, and Venus use their techniques (World Shaking, Death Reborn Revolution, Venus LoveMe Chain). Defend with ChibiMoon and only use her as the healer. If you're below 200 HP, have ChibiMoon immediately use a Bentou Set. If you run out of EP, use Cologne. Defend your characters if they are low on HP. Use Sailor Moon's Rainbow Moon Heart Ache and repeat the techniques with your other characters, until the Dragon is defeated.
Rewards after winning: 4520 EXPs, 10 Yen, Fragrance
Upon winning, Esmaraude will appear. She exclaims that you just beat her, not a dragon. She wants to fight you again. Sailor Moon asks about the Barazuishou, but Esmaraude says that the Barazuishou is now in the hands of Demando. Esmaraude notices that there are plenty of Sailor Senshi now, but that doesn't matter since it's time for battle!
Boss: Esmaraude
Esmaraude is tougher than the Dragon. She knows WhirlWindCut, which does considerable damage. She also knows Illusion (which will confuse your characters), and Toxic Mist (which causes Numb). I hope you have plenty of BathMedics at your disposal.
Just do what you did before. Have everyone defend in the first turn, except for ChibiMoon. Make ChibiMoon use Fragrance on all your characters. On the second turn, transform Sailor Moon using the MoonCup1 and have your other characters, except for ChibiMoon, defend. Use a Bentou Set, since you didn't get the chance to recover from the battle against the Dragon. If you run out of EP, use Colgone. If you're below 200 HP, use Bentou Set. You'll beat her the same way you did the Dragon. Good luck!
Rewards after winning: 5600 EXPs, 5500 Yen, Red Pupil
After the battle is over, Esmaraude dies. Sailor Moon remarks that there are threads of destiny that never meet. Such a sad love...
We have another Red Pupil. Yay! I recommend you equip the Red Pupil to Sailor Venus, as it will make her attacks even more powerful. Equip her the Red Pupil by unequipping the Anklet. Now go right, up the stairs. Exit the cave.
Outside the village
Backtrack to the yellow platform and step on it to board the Ark. The sidequest is over, by the way, so congrats to you for making it this far! Once you're in control of the Ark, press A (Y) to go back to the Silver Millennium.
The Silver Millennium
Queen Beryl has caused an apocalypse at the Silver Millennium! Everyone is on the run and Beryl exclaims that the people of the Moon are being annihilated! It's the end of the Moon. This way, Beryl and Endymion can live in their world.
Upon arrival, Sailor Moon is dismayed that the Moon Kingdom is under seize by Beryl. But she knows that she cannot change this since it is destiny.
Go to the Luna-P and save your game. Now go up to enter the next screen. You will notice a treasure chest on your left. Pick it up to get a Moon Shard. Keep moving up, until you trigger a scene.
Princess Serenity is lying on the ground, unconscious. Sailor Moon points out that it's her old self. She doesn't want to see this. Suddenly, Princess Serenity disappears! Sailor Moon wonders what just happened to her. Luna exclaims that she can feel the power of the Jakouzuishou. Sailor Moon knows it's Prince Demando and so, she yells out for him to come out. Demando appears, with Princess Serenity. Sailor Moon demands him to leave her old self alone. Demando agrees, but only if he can have Sailor Moon will he let go of Princess Serenity! Luna earnestly tells Sailor Moon not to fall into Demando, but she complies with his demands!
Sailor Moon asks Luna if this is what she said. They cannot let anyone change what destiny has guided the people of this time into. Demando tells Sailor Moon that if he can get her into his hands, he shall touch nothing else. Sailor Moon reluctantly submits and Demando teleports off with her!
The scene switches over to Queen Serenity, the fallen Inner Sailor Senshi, and Princess Serenity. Queen Serenity uses the powers of the Ginzuishou to teleport them to a chronological time and place. And of course, we know that Queen Serenity dies after using the powers of the Ginzuishou.
The Oppositios hover above, witnessing the Ginzuishou being used by the Queen. Sin remarks that it was the Ginzuishou from this time. Nabu states that the shards fell to Earth. Nergal asks if they should fight the Sailor Senshi now. Marduk says Apsu has already finished her plan. Sin says that if they get a shard of the Ginzuishou now, it would become powerless. Ishtar ponders about looking for teeny little shards. Nabu proclaims that they don't have to get them all, only one. They only need one to stop the Ginzuishou. Marduk states if the 7 Rainbow Crystals are brought together, the Ginzuishou will form. But if there are only 6, then it will be impossible. Sin says it would certainly “power down.” That would be all that they need for Apsu-sama to exert her power. Isthar joyfully says if they get one shard, their jobs will be done. The Oppositios teleport off.
Back to the other Sailor Senshi, Saphir appears and asks for them to open his brother's eyes. His brother, Demando, is confused. He is together with Sailor Moon in the basement of the Moon Castle. This is Saphir's wish...just to return to their Destinies. With that said, Saphir disappears. Luna suggests that they should go back now and tell the rest of the Senshi about what happened.
Sariel Village
Sariel Village
Back at Radina's house, Luna says that it was thanks to Sailor Moon that changes to the history of the past has been averted. But Sailor Moon has been taken away. So even if the Senshi protect the past, the outcome is the same. Mars cannot imagine a destiny without Sailor Moon, so she wants to help her. Uranus gives her sentiments that if Sailor Moon didn't exist, then her present self would probably not be here. Uranus wants to help out too. Neptune states that there would be no future without the Princess. Pluto proclaims that if Sailor Moon were to vanish from this time, it would make time contradict itself. They must help Sailor Moon.
Jupiter exclaims that it's because of Sailor Moon that all of the Senshi are good friends. They have to help her! Mercury says Sailor Moon is an important friend and they can't just stand by and watch this. Venus comments that Sailor Moon was too careless and a dunce. Plus she wasn't the smartest of all people (too true!). But they have to help her! ChibiMoon states that if Sailor Moon isn't with them, then she can't return to her original time! Luna agrees. None of them can imagine a future without Sailor Moon. It's time to go and help her! She should be held captive in the Moon Castle that Saphir talked about.
ChibiMoon wonders if there IS a basement in the Moon Castle and Luna answers yes. If you stand on the Symbol Mark at the Moon Castle, you should be able to get there. The scene switches over to the mark (NOTE: Be sure to remember that mark, ok?).
Time to form a new group. I recommend you bring along Venus, Uranus, Neptune, and Saturn. When you are done, you'll be in control of ChibiMoon. Exit Sariel Village.
Outside the village
Open up the menu screen and go to Formations. Make sure ChibiMoon and Neptune are at the back, while Uranus and Venus are at the front. Keep Saturn in the middle. Go to Accessories and equip Neptune the ABracelet by unequipping the Bracelet. Exit the menu screen when you're done.
Go back to that cave entrance and step on the yellow platform to board the Ark. Once you're on the Ark, press A (Y) to go back to the Silver Millennium.
The Silver Millennium
Save at the Luna-P if you want, then go up to enter the next screen. Keep moving up, then go left and step on that mark.
Basement
Go down and you will be stopped by Black Lady!
ChibiMoon recognizes herself! The Wise man turned ChibiMoon into Black Lady, destroying all the love inside her. Luna wonders how this can be, as Chibi-usa is right here with them! Black Lady exclaims that Apsu is changing this period's destiny. And boundaries cannot be set, but this is the truth. At any rate, Sin and her friends have stolen a shard of the Nijizuishou which makes up the Ginzuishou. Now, the power of the Ginzuishou is steadily becoming weaker. Chibi-usa will disappear in that time! Because what Apsu has decided shall become history. Black Lady wants to kill her for Apsu!
Boss: Black Lady
The bosses in this game are getting tougher! Black Lady knows Illusion (which will make this battle very annoying), and Toxic Mist (which Numbs). Make sure you heal from those ailments. She also knows WhirlWindCut, which could kill Uranus in one hit!
On the first turn have everyone, except ChibiMoon, defend. And have ChibiMoon use a Fragrance on all your characters. On the second turn, just hammer Black Lady away using techniques such as World Shaking, Death Reborn Revolution, Venus LoveMe Chain, and have ChibiMoon and Neptune as your healers. If your HP gets below 200, use a Bentou Set. Use Cologne if you run out of EP. Sailor Saturn is the key to your victory, as her technique does major damage after getting a boost from Fragrance. Mine did over 4,000 damage per turn!
Rewards after winning: 15,000 EXPs, 4000 Yen, Anklet
After the battle, Black Lady dies. Heal your characters, if they are low on health.
 Cave with Black Lady
Note: Random battles here are tough, but they give you a huge amount of EXPs. I suggest you gain a few levels while you're here. Get up to at least level 38 or higher.
Go down and you will come across an intersection - left or down. Go left and follow the path until you see a treasure chest. Open it to get a Rainbow Choker. Open your menu and go to Accessories. Equip the R.Choker on ChibiMoon by unequipping the Tiara. Exit the menu when you're done. Go left and you will find another treasure chest that contains a Bath Medic. Go down and follow the path until you see another intersection - left or right. Go right and follow the path until you find a treasure chest. Open it to get a Moon Drop. Now go back left and follow the path, until Saphir appears.
Saphir's wish is to stop his brother, Prince Demando. But he cannot do it all alone, so he will need the help of the Sailor Senshi.
After Saphir disappears, you'll see a treasure chest. Pick it up and you will get a Moon Pudding. Go left and go up the small entrance.
You will find Prince Demando and Sailor Moon! Demando heard that the Princess was after the Barazuishou. It's a good thing he took it from them. Though it would've been alright with the Princess from this age. ChibiMoon and the other Senshi appear. It stops right here, Demando!
Demando asks how they knew of this place. Suddenly, Saphir appears and tells his brother that, even if they do the same things again, it won't help. Demando wants to make the Princess his own, but... Demando understands. He can't get her no matter what he does.
From out of nowhere, Sin appears behind Demando and tries to kill him. Saphir quickly protects his brother, getting caught in Sin's attack, killing him. With his last bit of energy left, Saphir weakly tells Demando to set Sailor Moon free. Then they can be too... and he dies.
Sin comments on the siblings having similar feelings. She soon notices that the Sailor Senshi are here too. Like Demando, they have resurrected others. They are scrambling to get the Barazuishou. And those who cross the Oppositios shall meet their deaths. ChibiMoon and the Senshi won't allow this and demands for Sin to help Demando. But Sin demands a fight instead.
Boss: Sin
If you have been training your characters up to level 38 or higher, then Sin is pretty easy. Even more so than Black Lady. The only attack you need to watch out for is Sin's Barrier, as it petrifies a Senshi. If all your Senshi become stone, it's game over. So make sure you have one of your characters use Pork Chop/BathMedic to cure the accidents. Like Black Lady, Sin also knows WhirlWindCut (which does good damage to Uranus and Venus), Illusion (which confuses), and Toxic Mist (which causes Numb). Make sure you heal them up quickly. Use an F.Cream if you want to enhance their defense so that they can take less damage from Sin's attacks.
Apply the same strategy you used against Black Lady. On the first turn, have Neptune use a Manicure on Saturn. Have ChibiMoon use a Manicure on Venus, and defend with Uranus, Venus, and Saturn. On the second turn, have Neptune use a Manicure on Uranus. Use Uranus' World Shaking, Saturn's Revolution, Venus' LoveMe Chain, and defend with ChibiMoon. Heal if your HP is below 200 and use Cologne if you run out of EP. You'll beat Sin in no time if you've been training well. Good luck!
Rewards after winning: 20,000 EXPs, 11,800 Yen, RiasTopaz
Sin decides to withdraw for now. They've got what they wanted from this time. It's time to repay those who betrayed them. Sin kills Demando, exclaiming that it's for her mom and dad! She teleports off.
ChibiMoon asks if he's alright. Demando apologizes and says it wasn't the destiny he wanted to have. If Demando could change destiny, he'd make it so no battles would take place. He tells the Senshi to go to the future. If the future doesn't change, the present will. With that said Demando dies, leaving the Barazuishou behind for the Sailor Senshi! Yay, we FINALLY have it!
Luna goes over to Sailor Moon and tries to wake her up. Sailor Moon awakens and wonders what happened to Demando. Luna says that it's thanks to him that they finally have the Barazuishou. For everyone, even the Black Moon, must beat Apsu and her friends. Sailor Moon agrees and suggests that they should return to the present.
Luna prompts you to save the game. Save now, and this is FINALLY the end of Chapter 4!